
Rotating Stored Outdoor Supplies With a Simple Label System
Storage bins can appear to be perfectly organized and yet be filled with dead batteries, damp cords, old food and gear that was somehow packed but never to be used again. In almost every case, fixing a storage problem does not involve buying more shelving space; it involves establishing a system that can be repeated to locate stored items, check for freshness and to use the stuff before it goes bad. And that can all be done with a few simple labels. The key question is how to keep to keep enough supplies to be able to tackle a trip, deal with an outage or tackle some unusual weather-related task.
Start With the Items That Actually Drift
Start organizing one storage area or one shelf at a time. Choose that drawer, shelf, or storage bin where supplies disappear the most, like spare lanterns, camp cookware, water containers, first aid supplies, items related to fuel, and winter clothing.
Separate the contents into three working groups:
– Consumables that can be used up, damaged, or become unsuitable.
– Equipment that needs a function check or cleaning.
– Durable accessories that mainly need a known location.
There is a huge difference in the amount of inspection that needs to be put into items like a can opener (which will get used until it can't) compared to a rechargeable light or sealed medical items. This simple classification of your items will quickly reveal any non-working or poor storage items in your current organizational setup. A bin containing items to be used in emergency food situations mixed with muddy tent stakes is an example of items that would be better to group and organize first, rather than to attempt to organize with poor labeling of currently organized items.
Give Each Container a Job
Instead label each container with a description of the decision you made when putting the supplies into it. Instead of saying "Camping" say "Lighting – ready to use" or "Cook kit – clean and complete".
Label each bin with its purpose. Ideally each container should be able to be placed in a corner of a room to be used as a temporary storage location. A tote used for storing camp lighting could also hold the batteries for those lights. A bin for storing items for repairing a tent could hold all the cordage for tying up the tent. Even a simple plastic container with a lid can be a useful bin for a specialized category of items.
For items that are loose in a storage container use a smaller inner pouch or resealable bag to store the items and put the outer label on the storage container. The inner label of the pouch or bag can then list the sub-group of items that are contained in the storage container. This way valuable items that are needed for trips are not lost at the bottom of a mixed storage container for example camping gear and trip supplies even though they are for the same activity.
Put Dates Where They Can Be Read
A simple label needs only to contain a few fields of information. The main part of the label should list the items that have been placed in the container, and the date that they were checked. Additional information that is relevant could be added such as when items need to be used, or if equipment needs to be cleaned prior to being put away.
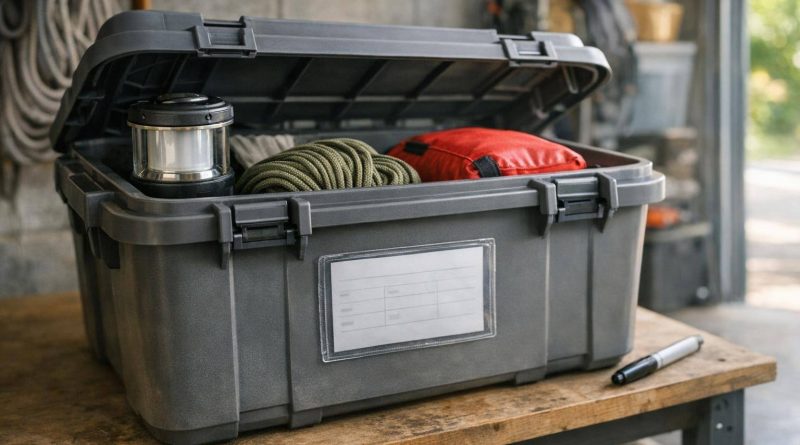
Avoid formats that are difficult to read. Use simple Painter's tape and marker labels or enclose them in plastic sleeves and store them in the same container as the supplies. Although the permanently labeled container may look neat, remember the contents will change over time. Do not rely on a permanently labeled container for your supplies.
Date only is not enough. For example, a date does not tell you if a lamp is working or if a stove kit is complete for all parts. A short status note is way better than a long list of items which most people will not update.
Rotate by Use, Not by Ritual
Rotating your supplies through use makes the most sense. Pack your oldest supplies so that they are used first, and then pack your newest supplies behind them. Same goes for soap, batteries, water treatment chemicals, packaged foods and other supplies that degrade over time. Usually these types of supplies get stored in cabinets or bins, and you take them out one at a time from the front of the box. This way the oldest supplies get used up first, and you are replacing them with new ones in the back of the box.
A strict first-in, first-out approach requires more attention. The alternative of 'check it sometime' however stores up more problems in the long run. It is better to set up a system of checking which takes some thought but is less prone to error for higher consequence items. Low risk items are likely to need checking less frequently i.e. when the container is opened.
It is not safe to assume that printed dates or manufacturer's recommended storage conditions remain valid after a certain time has passed. The packaging and storage conditions of supplies may have deteriorated. For products such as food, hygiene items, medical products, water and fuel supplies, make sure you are following the current instructions from the supplier or relevant authority.
Make the Check Small Enough to Repeat
There is sufficient time for a useful review each time a container is opened. Check for signs of moisture, pests, corrosion, cracked or broken containers. Test powered equipment as recommended by the manufacturer's instructions for that particular item. Check the condition of cables and seals and return packaging to its best condition where applicable.
Keep a short list of things to be replaced rather than solve all problems immediately. As an example of useful notes: "Replace two batteries", "Wash rain cover", "Find missing parts of the tent pole". The worst note would be "Sort gear".
For larger storage spaces, it can be helpful to choose a recurring trigger rather than trying to organize around a specific time frame. For example, check out seasonal gear at the beginning of the season, go through all your camping gear the week before a planned trip, or do a household-wide cleaning of storage spaces the first weekend of every quarter. If you find that you're repeatedly failing to complete a review of your supplies, make the review smaller! Ten minutes to check out one active bin is far better than never checking out any of your supplies at all.
Store the Label System With the Supplies
Markers, spare labels, tape, and a 'discard'/'repair' bin for worn supplies should all be stored near the storage area itself. As with all preparation, having the supplies to write on the labels in the first place is a good idea. And where several people are using the same supplies, agree upon a few very simple words to use for a status note (e.g. 'ready', 'clean', 'repair', 'replace', 'use first').
There's no need to keep a complete inventory of all the containers and their locations. Simply listing the name of the container and the location where it is stored is enough. Updating the note when the container is moved is also recommended. Having a photograph of a packed container is also sufficient to remind you how you had packed it in the first place. However, remember that the image is there to support the label and not the other way round.
Don't get to upset if the preparedness storage system labeled for all of your gear gets scuffed up while it's being moved from place to place. It doesn't have to be a perfect picture every time you look for it. The main goal is to have visible supplies of gear that can be found, checked, and put to use before they start to deteriorate.